Showing posts with label freebie. Show all posts

Friday, January 02, 2015

2014 Christmas gift round-up

"It is Christmas in the heart that puts Christmas in the air."
-W.T. Ellis


This year wasn't a super crafty Christmas, but I did put together a few gifts that I was really excited about giving. Here's a round-up of my favorite creative gifts that I gave this year:

For my good friend who was dreading her first divorced Christmas
A "Christmas Afternoon" box filled with fun goodies to create new Christmas traditions, including a jigsaw puzzle, a dvd movie, a hot cocoa and tea gift set, Handmade Charlotte ornament craft kits, a candle, a cute ornament, and a chocolate lollipop.


For my sister-in-law's family
Knowing that my nephews (age 5 and 11) would receive gobs of toys for Christmas, I opted for a "Strikes and 'Staches adventure" package that included a gift card to the local bowling alley, fake mustaches, and a pair of fun socks for each person.


For my Sunday School friends
Last year I surprised my friends by leaving a roll of wrapping paper at each of their doors, and I was then surprised by how much it meant to some of them. I found this cute idea from Kristen Duke on Pinterest and thought it would be great for this year. I wrapped up a set of paper plates and napkins from IKEA, stuck my own tags on, and gave them out as combination Christmas/baby shower hostess gifts.


Christmas wrapping for everyone
Even in a year when I tried to scale back my Christmas planning, I was still eager to coordinate my wrapping. It's a tradition that I enjoy so much that it really doesn't feel like work to me. I was inspired by this One Fine Dae packaging that I ran across on Pinterest, but I jazzed up my zigzag-stitched kraft paper envelopes a bit by including red and lime green masking tape and my own graphic tags. Download the printable tags here.


Here's hoping that the recipients enjoyed the gifts as much as I enjoyed giving them!

Thursday, September 18, 2014

It's a ...

"Snips and snails, And puppy-dogs' tails, That's what little boys are made of."

I left you hanging the other day, waiting for the big news... which will it be?

Well... Rob and I are excited to announce that we are expecting a baby boy, due at the very end of January 2015! Everything looked wonderful at our 20-week appointment yesterday! [The news is just too good not to shout from the rooftops (aka, every social media platform)!]


After every doctor's visit, we've celebrated with a doughnut (or two!). Yesterday was no exception...


We had something extra special to celebrate this time!


Krispy Kreme even had the light on for us. Nothing beats a hot, fresh glazed doughnut...


Can't wait to meet you, Baby Boy!!


___________________________________________________

Want to print some "It's a boy" or "It's a girl" cupcake flags for your own celebration? Just right-click the image below and choose Save As...


Saturday, July 06, 2013

Sketch it out...

“When the creative impulse sweeps over you, grab it. You grab it and honor it and use it, because momentum is a rare gift.”
-Justina Chen Headley, North of Beautiful


The coolest birthday present I received this year... a Wacom Bamboo Connect tablet. As I tore off the wrapping paper and realized what was inside, I immediately knew exactly what my first project would be.

I've been following along with the One Little Word workshop prompts this year (and totally loving where it's guiding me, by the way!!), recording my thoughts and ideas in an Evernote document. However, I'm a little behind in the creation of actual album pages.

I have been stuck on the May prompt... not too enthused about the doodles that I've sketched on notepads at work. But with a tablet, a whole new world was opened.

On our rainy 4th of July, I spread out across the dining room table and got to work. Drawing and tweaking... drawing and nudging... drawing and twisting.

I'm totally tickled with the results and can't wait to print them out for my album.

To celebrate my first tablet project, I'm sharing my wordart with you. Download them here [right-click the image and save as]:

___

I'm also eager to use the tablet for other scrapbooking and design projects... any ideas? Do you know of any resources or sources for inspiration? Share with a sister!


Tuesday, November 13, 2012

My heart is heavy...

"The only courage that matters is the kind that gets you from one moment to the next."
-Mignon McLaughlin

More than once I have tried to write this post, but my mind has been a jumble of emotions lately. Some of my close friends have been struggling with illness and grief, and my heart aches for them.

There is nothing I hate worse than feeling out of control... and it is not easy to know that there is very little I can do to make it all of their hurt and pain disappear.


So instead... I brainstorm ways to raise money and build support. I send cards and small gifts to let them know I am thinking of them. I am wary of when I am truly helpful, and when I am a nuisance. I offer up my prayers for strength and healing. I have faith in God's will.

If you find it as difficult as I did to find a card that shares the right sentiment for these tough situations, I offer you the graphic above for download. Pick your favorite color: red-orange, lime, turquoise, or cobalt.
 
Print it out as a card... post it on someone's Facebook page... share it with someone who needs to know that you care.

A couple of links I want to share:
  • Be The Match: connects patients fighting diseases like leukemia with marrow donors for life-saving transplants. Your contribution could be someone's cure.
  • Marrow Christianity: my pastor's new blog to reflect upon his journey with Non-Hodgkin's Lymphoma and an upcoming blood marrow transplant.
  • Rest Ministries Pinterest Boards: a catalog of great ideas for dealing with illness.

Thursday, June 28, 2012

It's Tour Time!

"It never gets easier, you just go faster."
-Greg LeMond


If you're a regular reader or you know me in real-life, you've probably picked up on the fact that Rob and I are bicycle enthusiasts. While Rob's a little more hardcore in the athletic department, I get just as giddy about watching a good bike race.

Needless to say, we're excited that this year's Tour de France starts on Saturday. (In fact, Rob told me he probably wouldn't even miss me much while I'm out of town this weekend!) So to celebrate, I whipped up this little banner to hang on our mantel for the next three weeks.

I happened upon just enough 4"x6" sheets of yellow paper cut from another project. Together with a couple of white sheets and some black curling ribbon, my awesome banner came together.

Click here to make one of your own: Tour De France Banner

Wednesday, June 06, 2012

Happy 500!

“To accomplish great things, we must dream as well as act.” 
-Anatole France

5 years, 10 months, and 24 days ago I decided to dip my toes into the world of blogs. And, thus Dancing Commas was born. I was newly graduated from college, living in my first off-campus apartment, and not even engaged yet. Wow! That was a long time ago!

Here we are 500 posts later!


Since beginning of Dancing Commas, I've moved three and a half times, gotten married, been employed, unemployed AND semi-employed, and been on at least four epic vacations. I've decorated, crafted, sewn, and scrapbooked up a storm. Partly because it's in my blood: partly because I needed blog content. 

There have been times when I've blogged everyday and times when I've been away for weeks or months at a time. 

Dancing Commas is my virtual journal of memories but also a treasury of ideas. It's my place to explore my possibilities and dreams but also to reach out into the world. I write each post for myself but also knowing that there might be others out there who enjoy reading about my experience.

My little corner of the web is dear to me. Thank you to my few but loyal readers who join me regularly in this space!

I want you to celebrate this milestone with me! I've designed several desktop wallpapers showcasing some of my favorite quotes. A little bling just for you! (Sized to fit normal width, widescreen, and even iPhone screens.)
 

Download:


Download:

Happy 500!

Tuesday, February 28, 2012

Good thoughts...

“Hold fast to your dreams, for without them life is a broken winged bird that cannot fly.”
-Langston Hughes

As you probably know, I've always been a quote collector. But, recently I've been collecting quotes for a special project I'm working on. Only quotes that personally resonate with me right now. That inspire me today. That mean something to me in this moment.

It was impossible not to share this one...

Quote seen attributed to Ellen Johnson Sirleaf. Art by Jana Brunken.


Being unemployed gives me lots of time (and reasons!) to dream. Sometimes it's hard to embrace the scary dreams, but I've got to hope that some of the big dreams will come true one day.

Friday, February 24, 2012

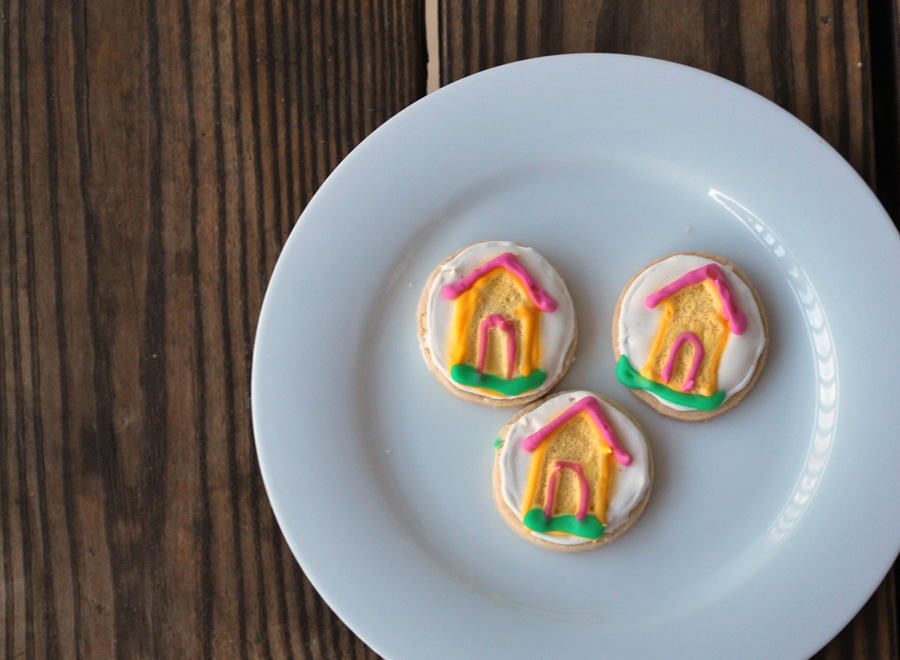
A neighborhood of cookies...

“God gave you a gift of 86,400 seconds today. Have you used one to say “thank you?"
-William A. Ward

One of the few blessings of the home sale process (besides finally closing that chapter of our lives!) was meeting and getting to know our real estate agent. His name is Robert Delay, if anyone in the Atlanta area is in need! To thank him for his awesome work (he basically sold our house three times before it was all over!), I put a box of sweet treats in the mail to him today.


I had an idea for sugar cookies in my head, and I spent the last couple of days making it happen... after watching several videos (here's a good one from JoyofBaking.com!) about cookie decorating and making a trip to Hobby Lobby for icing tips.

Of course, a good blogger stops along the way to snap some Instagram shots!

I carefully stacked the cookies in an empty (and decorated!) Pringles can, and then stuffed a bunch of bubble wrap and tissue paper so the tube wouldn't wiggle. Topped it off with a personalized card, and sent it off on its journey. Hopefully Bob enjoys the small token of our appreciation!


If you, too, want to show some gratitude to someone in your life, feel free to use this thank you printable. You can cut out the graphic itself and adhere to kraft paper card like I did, or just cut out on the outer lines and fold in half.

To download the printable, right-click the image below, and click "Save Image As."

Tuesday, February 14, 2012

Canvas Photo Tutorial

"Love is when you can be your true self with someone, and you only want to be your true self because of them."
-Terri Guillemets


Want to see what my husband's getting for Valentine's Day?? You have to promise to keep it quiet for a couple of more hours until he gets home from work.... pinky swear??

My tradition is to make my Valentine's Day gifts for Rob. And, sometimes that's tricky, given that we're not a super-duper, lovey-dovey, smooshy-mushy couple. Here are a couple of ideas that I've used previously: 2011, 2010, 2009, 2008.

This year, I spiced up a favorite photo (from our 2010 Washington trip) with a favorite sentiment and then took advantage of a project I had been wanting to try: canvas photo art. There are lots of tutorials out there, but I thought I would show you what worked for me. Despite my initial apprehension, it turned out great. Just need a house with walls to hang it on!


Supplies needed: photo printed to size (I used a 12x12 matte photo from Persnickety Prints), canvas, acrylic paint, Mod Podge, foam brushes.


Step One: Paint the edges of the canvas with dark acrylic paint. Make sure to blend the color over to the front and back edges of the canvas.


Step Two: Trim your photo to size... be careful because canvases are not always exactly the dimensions they say the are. I trimmed enough so that the image was just the slightest bit (I mean, less than a millimeter!) smaller than the canvas. Just enough so that it didn't overlap!


Step Three: Paint an even layer of ModPodge on the back of photo. You want to completely cover then page. Turn over and adhere to the canvas. Lightly rub a clean cloth (or your sleeve!) over the surface to remove any air bubbles.


Step Four: Even after my coat of ModPodge, I found that the edges didn't stick very well, so I peeled up the edges to reinforce the corners. Let sit for 5 minutes.


Step Five:  Carefully paint a thin, even layer of ModPodge over the top of the photo. Make sure to go in the same direction and to avoid globs of glue or little crumbs of dried glue. This is the part that had me scared... it goes on milky white, but I promise it dries almost clear.


Step Six:  I wasn't totally happy with my coverage the first time around, so a couple of days later, I added another coat of ModPodge on top. After this dried, all of my "problem areas" were fixed, so I'm really glad I took that chance with the second coat.


And, a Valentine's Day gift from me to you... the boot photo for your own use. Maybe you use it as your desktop background, print it for a frame, or maybe even make a canvas of your own.

To download the photo, right-click the image below, and click "Save Image As."

Friday, December 16, 2011

Felt letters how-to...

"Wanted: a needle swift enough to sew this poem into a blanket."
-Charles Simic

My youngest nephew turns two next week. With his birthday so close to Christmas, I knew I wanted to make something special for him.

At first I was inspired by the many different ABC projects that I saw on Pinterest:


Then I remembered I'm a commitment-phobe, and I could never commit to 26 individual letters. But, what about numbers? There's only ten of them!

Look how cute they turned out!


If you want to make a set of your own, you will need:
  • Plenty of felt : I bought one mini-sheet of each color.
  • Plenty of thick embroidery thread
  • Needle
  • Stuffing : I actually used quilt batting because I could cut it into strips.
Steps:
  1. Print outlines of the big numbers on cardstock; I fit four to a page.
  2. Trace each number on the felt with a sharpie.
  3. Stack/fold your felt and cut two of each numbers.
  4. Use the blanket stitch to sew around the exterior of each number. I had to reacquaint myself via a tutorial at Futuregirl Craft Blog.
  5. Use a pencil/pen/chopstick/etc. to stuff the numbers as you go. Stitch up the final hole.
  6. Throw the number to the side, and start the next one. Thank goodness that you have only 10 to do!
Find a small totebag or make a little drawstring bag to hold all of the numbers. And, of course don't forget to attach the cute tag!

    Wednesday, June 01, 2011

    Photo Challenge: Day 15

    "Ah, summer, what power you have to make us suffer and like it."
    -Russel Baker


    Day 15 (06/01/11): A photo that focus on the eyes.
    Went to Target today looking for a new pair of sunglasses. Didn't find any that I couldn't leave the store without, so I'll keep searching. With an endless summer ahead of me, I need some shades for the pool. Wish I had someone to go with.

    Inspired by sunglasses, I doodled this illustration up this afternoon. It's a 4.5x6 print, so feel free to print out and send a postcard to someone. 

    Tuesday, July 20, 2010

    Math teachers only...

    “Sometimes I'm confused by what I think is really obvious. But what I think is really obvious obviously isn't obvious...” -Michael Stipe

    Any math teachers that want to share in some goodies for their classroom....?? Anyone....??
    As the new school year creeps terrifying close, I spent today working on some new posters for my classroom walls. Solving word problems is one of the skills that my students fear the most. When they see words in math class, their minds shut down. So, to combat that stumbling block, I've created these great posters to hang on the wall. I'll print them out as 16x20 poster prints from Sam's Photo Center, and then probably laminate them before they go up on the walls. I'll probably create a graphic organizer handout that looks similar when we reach this specific concept.
    Feel free to right-click, save, print, and use in your own classroom.

    Tuesday, July 13, 2010

    Kid's travel journal

    “You never saw a very busy person who was unhappy.” -Dorothy Dix

    In a few days I'm headed out on a weekend trip with my in-laws. 22 hours total in the car with my 6-year-old nephew seems exhausting already, so in addition to the travel games, books, and activities I've collected over the last couple of days, I decided to make a travel journal for Chase to record his memories from his first big road-trip.
    Of course, I'm known to go above and beyond, and I'm sure I put forth way more effort than necessary for the job. Let's just hope it holds his interest for a couple of minutes. For my pride and more importantly, for our sanity!
    I've also created a printable pdf to share with you. You'll find it at the end. I've removed the more personal touches from the original design and made it customizable for any trip (up to 12 days long!).You could choose the print-and-run method: print your pages on black and white, add some envelopes to save souvenirs, and then bind with rings. Or there's also the scrapbook-like route: add paper, stickers, ribbon, etc. to make it one of a kind.
    What's included in the book:

    • Cover page
    • Overall trip plans, including where we are going, a map of the USA, who's going with us, and what we packed
    • Section title page for each day of the trip (Days 1-12 are included)
    • Journal page for each day of the trip
    • Envelopes to collect souvenirs each day and a corresponding label for the envelope
    • Post-trip/Looking Back section, including favorite memories, additional journal pages, additional drawing pages, and pages to attach a photo
    Here are the materials I used for Chase's trip journal:

    • I started off with the "so cool" scrapbook journal kit from possibilities by kolette. This really just served as an inspiration point for me, although I did end up using the acetate covers, the book plate, and a couple of the woven tabs. However, each of these can be easily reproduced or adapted for your own journal.
    • Two different scrapbook paper patterns to trim pages: the blue map paper is "Road Trip" from the "Destination Vacation" collection by Reminisce and the green iconic paper is "Road Trip" by Karen Foster Design.
    • To embellish the pages, I used "Are We There Yet?" rub-ons from Reminisce's Phraseology line and self-adhesive diecut stickers from Reminisce's Genuine Boy collection.
    • Green satin ribbon to create the additional tabs for each section.
    • White cardstock for each page. I cut the pages to 5" by 6.625" before running through the printer. Yes, I know it's not the easiest size to create, but that's the direction my inspiration kit took me.
    • White envelopes to collect the souvenirs from each day. My original thought was to use paper CD sleeves, like these, but in the end I just decided on greeting card envelopes (with the flap covered in coordinating paper).

    Now on to the download...
    Travel Journal


    **UPDATED!! The downloadable file is now available through Google Drive.

    You might also enjoy...

    Related Posts Plugin for WordPress, Blogger...