"Babies are always more trouble than you thought, and more wonderful."
-Charles Osgood
In my last post I mentioned my struggle to find brown pants for babies. After looking at several local stores with no luck, I wondered if I could make some for Silas. In my search online for a tutorial, I discovered the treasure that is Brindille and Twig sewing patterns... so many cute clothes for little people.
After much debate, I chose the Cuff Pants pattern as my first purchase. At 3/4 yard per pair, it didn't take much fabric. So I stopped by JoAnn's to pick up a few different knit options.
There were only five pieces to cut out per pair, and the photographs that Brindille and Twig provides in the directions made piecing them together a breeze. I could have completed a pair in a single sitting if it wasn't for a baby boy who seemed to always wake up from his nap right before I sewed the ankle cuffs in. The ankle cuffs in the little baby sizes were so small; it took all of my concentration to attach without sewing each cuff to itself.
After completing the first two, I went digging through my fabric stash for more knit fabric. I was excited to find some red fabric leftover from a failed Superman costume in college (don't ask!). I probably wouldn't have chosen red at the store, but it turns out that Silas has several cute onesies that match.
I'm one proud mama when Silas wears his new pants. And, what's even better is that because the pattern is sized up to 6T, he can have custom pants for years to come!
Showing posts with label sewing. Show all posts
Saturday, April 25, 2015
Friday, October 17, 2014
Nursery progress... part 1
"Every baby needs a lap."
-Henry Robin
When we left off in the nursery, I was debating what fabric choices and color scheme to move forward with. Would it be the modern woodland theme or the graphic feather theme?
After exploring and brainstorming about each option, I just went with my gut and the choice that seemed to best match the decorating style that I had in mind. A quick look at my pins on Pinterest, and I knew that bold and graphic was the way to go.
So... feathers it is!!
Ever since we moved into this house, we knew that the small bedroom in the corner of the second floor would be the nursery, if and when we needed it. In fact, while babies were still far on the horizon, Rob and I compromised on calling this room, "The B.R." ... which stood for both "bonus room" and "baby room."
I've also joked that this is the room where furniture goes to die. As we phased out furniture from our college and apartment days, we moved it in here, hoping we would find someone who could revive it. Futons, chairs, entertainment centers, side tables, rugs... it was all stacked up in here. We knew we had a bit of decluttering to do before we could fit a baby in here as well.
When Mama came to visit at Labor Day, I knew this would might be only chance to have her sewing expertise on location before Baby B was born. We made the most of our four days together, making multiple trips to multiple fabric stores, squeezing in a dash around IKEA, and sewing up a storm. She also posted about our adventures over at Mommy's Treasures.
I'm so excited by the progress we made! This is now my favorite room in the house! Now if I can just motivate Rob to help me clean up the rest of the room, order a crib, and paint the walls, then we'll be in business. I'll keep you posted...
-Henry Robin
When we left off in the nursery, I was debating what fabric choices and color scheme to move forward with. Would it be the modern woodland theme or the graphic feather theme?
After exploring and brainstorming about each option, I just went with my gut and the choice that seemed to best match the decorating style that I had in mind. A quick look at my pins on Pinterest, and I knew that bold and graphic was the way to go.
So... feathers it is!!
![]() |
| Click here to see fabric sources |
I've also joked that this is the room where furniture goes to die. As we phased out furniture from our college and apartment days, we moved it in here, hoping we would find someone who could revive it. Futons, chairs, entertainment centers, side tables, rugs... it was all stacked up in here. We knew we had a bit of decluttering to do before we could fit a baby in here as well.
When Mama came to visit at Labor Day, I knew this would might be only chance to have her sewing expertise on location before Baby B was born. We made the most of our four days together, making multiple trips to multiple fabric stores, squeezing in a dash around IKEA, and sewing up a storm. She also posted about our adventures over at Mommy's Treasures.
During our time together, we were able to make amazing progress on the window-side of the nursery (the other half is still piled high with furniture!) Here's what we accomplished:
- Sewed and hung a window valance
- Assembled three Kallax cube shelves
- Rearranged furniture and moved my grandmother's rocking chair from the guest room
- Upcycled a cushion that we had made a couple of years ago into a window seat cushion
- Made throw pillows galore
- Sewed several fitted crib sheets in coordinating fabrics
- Planned to make fitted covers for the changing table pad (once I can measure it)
- Failed at making a Boppy pillow cover... decided it's worth it just to buy that!
- Made and stuffed (with a lot of effort) an ottoman
I'm so excited by the progress we made! This is now my favorite room in the house! Now if I can just motivate Rob to help me clean up the rest of the room, order a crib, and paint the walls, then we'll be in business. I'll keep you posted...
Sunday, September 14, 2014
Nursery Fabrics
"To be pregnant is to be vitally alive, thoroughly woman, and undoubtedly inhabited."
-Anne Buchanan
My mom planned to visit for Labor Day weekend. And, knowing that this might be the only time she's at my house before Baby B is here, I really wanted to take advantage of her sewing expertise and get started on the nursery.
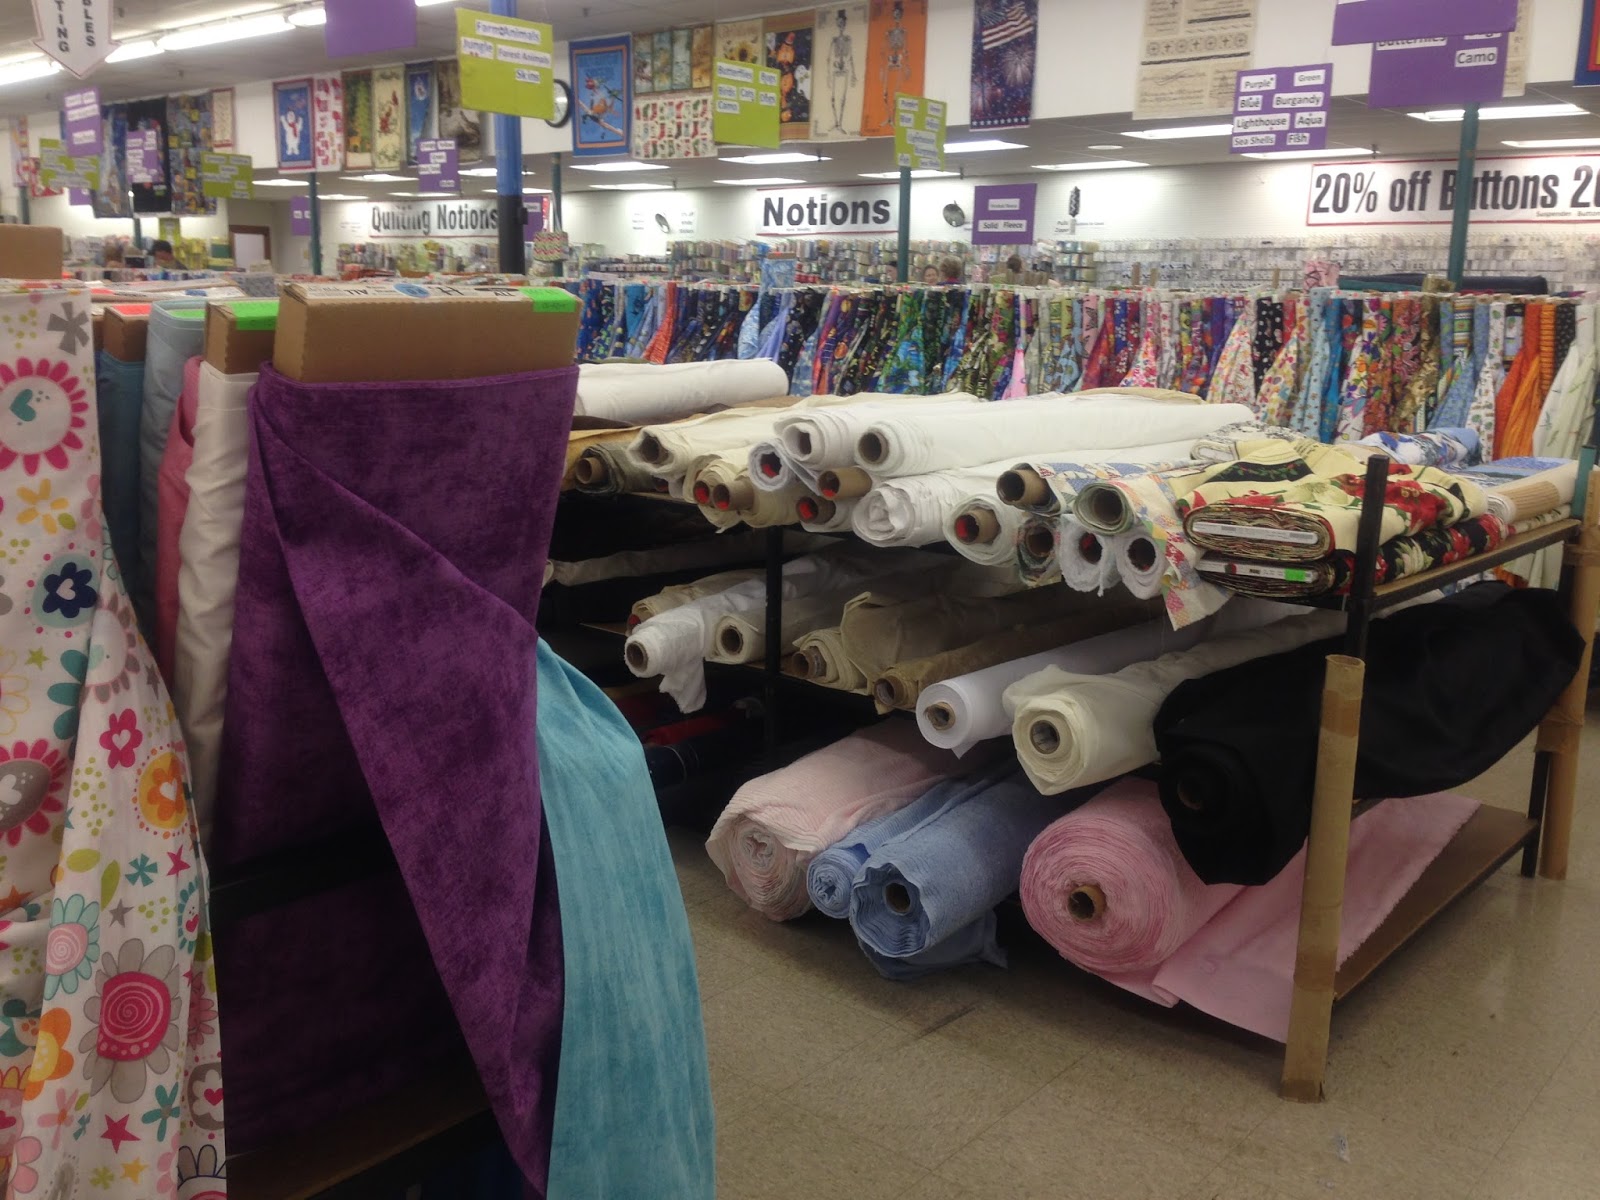
A new sewing project means one thing... a trip to Mary Jo's Cloth Store. I headed up to Gastonia (only an hour and a half from my house) one Saturday afternoon with the goal of gathering fabric swatches in a couple of color schemes.
We wouldn't know Baby B's gender for a few more weeks, so I wanted to start with a gender-neutral base. (Even if we did know, I don't think we'd go over-the-top girly or boyish anyway!)
Two and a half hours later, I had collected three sets of fabrics. However, before I even got home, I had already narrowed it down to the top two contenders. Take a look!
Would it be Option A? The modern woodland theme?
Or would it be Option B? The graphic feather theme?
I gave myself two weeks to decide before my mom came to town and we could go back to purchase the full yardage. Although I (and everyone else that I asked) was originally leaning towards Color Scheme A, halfway through I started to second-guess myself.
-Anne Buchanan
My mom planned to visit for Labor Day weekend. And, knowing that this might be the only time she's at my house before Baby B is here, I really wanted to take advantage of her sewing expertise and get started on the nursery.
A new sewing project means one thing... a trip to Mary Jo's Cloth Store. I headed up to Gastonia (only an hour and a half from my house) one Saturday afternoon with the goal of gathering fabric swatches in a couple of color schemes.
| Mary Jo's Cloth Store... the fabric mecca of the Southeast |
We wouldn't know Baby B's gender for a few more weeks, so I wanted to start with a gender-neutral base. (Even if we did know, I don't think we'd go over-the-top girly or boyish anyway!)
Two and a half hours later, I had collected three sets of fabrics. However, before I even got home, I had already narrowed it down to the top two contenders. Take a look!
Would it be Option A? The modern woodland theme?
![]() |
| [clockwise: Riley Blake Boy Stripes Orange | Riley Blake Scenic Critters Blue | Riley Blake Boy Swirls Aqua | Michael Miller Tile Pile Dirt | Michael Miller Garden Pindot Clem] |
Or would it be Option B? The graphic feather theme?
![]() |
| [clockwise: Michael Miller Birds of a Feather Quill | Micheal Miller Clown Stripe Limeade | Michael Miller Garden Pindot Clem | Michael Miller Dino Roars Stitch | Michael Miller Diddly Dot Sky] |
I gave myself two weeks to decide before my mom came to town and we could go back to purchase the full yardage. Although I (and everyone else that I asked) was originally leaning towards Color Scheme A, halfway through I started to second-guess myself.
Any guesses as to which direction I chose?
Wednesday, February 08, 2012
Fabric Valentine's Envelope...
"The best and most beautiful things in the world cannot be seen or even touched. They must be felt with the heart."
-Helen Keller
It's always such a surprise (and a moment of serendipitous joy!) to find a personalized note in the mailbox. Do you need some pretty mail for your Love Mailbox??
I had been planning this fabric envelope project in my head for several months, but couldn't decide on a theme-- should it hold letters to Santa, notes of gratitude, or photos of special memories?? In tomorrow's project, we will make a special Valentine's-themed love note to fit inside!
Materials needed: khaki linen fabric, patterned fabric, white fabric, lightweight interfacing, Steam-A-Seam, thread, buttons, letter stamps, stamp pad, sticky-back velcro, bone folder, scissors.
Step 1: Cut out two pieces of khaki linen fabric, using the pattern below. Cut out a piece of interfacing just smaller than the pattern. Cut out some scraps of white and patterned fabric to use as the "stamp" and "label."
Step 2: Adhere the interfacing to one of the pieces of linen fabric, according to the manufacturer's instructions.
Step 3: Use stamps, zig-zag stitches, and buttons to embellish the "stamp," "label," and even the closure button. This part is very similar to the Valentine's Fabric Tags tutorial from Monday.
Step 4: With right sides together, sew around the sides of the linen envelope, leaving one side open. Turn right-side out, and use a bone folder to push the seams out.
Step 5: Top-stitch around the whole flat linen envelope, closing the open end.
Step 6: Fold the bottom edge up to the line where the flap begins. Top-stitch the sides again. Or you can use a blind-stitch if you don't want the extra seam to show!
Step 7: Add a square of sticky back velcro to the flap to keep the envelope closed.
-Helen Keller
It's always such a surprise (and a moment of serendipitous joy!) to find a personalized note in the mailbox. Do you need some pretty mail for your Love Mailbox??
I had been planning this fabric envelope project in my head for several months, but couldn't decide on a theme-- should it hold letters to Santa, notes of gratitude, or photos of special memories?? In tomorrow's project, we will make a special Valentine's-themed love note to fit inside!
Materials needed: khaki linen fabric, patterned fabric, white fabric, lightweight interfacing, Steam-A-Seam, thread, buttons, letter stamps, stamp pad, sticky-back velcro, bone folder, scissors.
Step 1: Cut out two pieces of khaki linen fabric, using the pattern below. Cut out a piece of interfacing just smaller than the pattern. Cut out some scraps of white and patterned fabric to use as the "stamp" and "label."
Step 2: Adhere the interfacing to one of the pieces of linen fabric, according to the manufacturer's instructions.
Step 3: Use stamps, zig-zag stitches, and buttons to embellish the "stamp," "label," and even the closure button. This part is very similar to the Valentine's Fabric Tags tutorial from Monday.
Step 4: With right sides together, sew around the sides of the linen envelope, leaving one side open. Turn right-side out, and use a bone folder to push the seams out.
Step 5: Top-stitch around the whole flat linen envelope, closing the open end.
Step 6: Fold the bottom edge up to the line where the flap begins. Top-stitch the sides again. Or you can use a blind-stitch if you don't want the extra seam to show!
Step 7: Add a square of sticky back velcro to the flap to keep the envelope closed.
To download the envelope pattern, right-click the image below, and click "Save Image As."
Monday, February 06, 2012
Valentine's Fabric Tags Tutorial
"If I had a flower for every time I thought of you, I could walk in my garden forever."
-Alfred Lord Tennyson
Today is Day #1 of Valentine's Week here at Dancing Commas. Here is the first project of a whole series I have planned for the week. Three different fabric tags to express your love. Use them to top your sweetheart's gift or just send along to your best friend. Make one, or make them all!
Materials needed: khaki linen fabric, patterned fabric, white fabric, lightweight interfacing, thread, matching buttons, Steam-a-Seam, pinking shears, bone folder, letter stamps, stamp pad
Step 1: For each tag, cut two of each shape from the khaki fabric. Also, cut a piece of interfacing just smaller than each shape and attach (according to the manufacturer's instructions) to the back of one of the khaki pieces.
Step 2: Stamp a love message on a small scrap of white fabric.
Step 3: Use Seam-a-Seam to adhere the patterned scrap and the stamped scrap to the center of each khaki tag (the piece without the interfacing).
Step 4: Embellish the tag with zigzag stitches and mini buttons.
Step 5: Cut a 8" by 2" piece of patterned fabric. Press in half. Then, press each end toward the center crease to create a 1/2" fabric ribbon. Top stitch both edges of the ribbon.
Step 6: Pin the khaki pieces with right sides together (the fabric ribbon should be looped towards the middle and sandwiched in between). Stitch three sides with a 1/2" seam allowance, leaving an opening to turn right-side out.
To download the tag patterns, right-click each image below, and click "Save Image As."
-Alfred Lord Tennyson
Today is Day #1 of Valentine's Week here at Dancing Commas. Here is the first project of a whole series I have planned for the week. Three different fabric tags to express your love. Use them to top your sweetheart's gift or just send along to your best friend. Make one, or make them all!
Materials needed: khaki linen fabric, patterned fabric, white fabric, lightweight interfacing, thread, matching buttons, Steam-a-Seam, pinking shears, bone folder, letter stamps, stamp pad
Step 1: For each tag, cut two of each shape from the khaki fabric. Also, cut a piece of interfacing just smaller than each shape and attach (according to the manufacturer's instructions) to the back of one of the khaki pieces.
Step 2: Stamp a love message on a small scrap of white fabric.
Step 3: Use Seam-a-Seam to adhere the patterned scrap and the stamped scrap to the center of each khaki tag (the piece without the interfacing).
Step 4: Embellish the tag with zigzag stitches and mini buttons.
Step 5: Cut a 8" by 2" piece of patterned fabric. Press in half. Then, press each end toward the center crease to create a 1/2" fabric ribbon. Top stitch both edges of the ribbon.
Step 6: Pin the khaki pieces with right sides together (the fabric ribbon should be looped towards the middle and sandwiched in between). Stitch three sides with a 1/2" seam allowance, leaving an opening to turn right-side out.
Step 7: Turn right-side out, using a bone folder to push all of the seams out. Pin flat, and top-stitch around edge.
Don't mind our brass doorknobs in the photo below. There's not a single doorknob in our whole apartment that doesn't have paint splattered on it!
To download the tag patterns, right-click each image below, and click "Save Image As."
Wednesday, January 25, 2012
To infinity and beyond...
"The color of springtime is in the flowers, the color of winter is in the imagination."
-Terri Guillemets
I've been dreaming of infinity scarves for a couple of months now, but wasn't quite sure I could pull off this fashion-forward trend.
That is, until my sister-in-law gave me one for Christmas, and I wore it a couple of days in a row. [See self-portrait I took a couple of weeks ago.]
At that point, I took things into my own hands and bought supplies to make another one. Found this awesome Native American print (to be honest, completely different than what I had first imagined... but I knew it was perfect when I saw it!) at Joann's! And, Saturday afternoon after my Home Sweet Home project, I just kept sewing.
The project was quick and easy, and a great way to practice working with knit fabrics. I bought 1/2 yd of stretchy knit fabric, folded it in half, and sewed right sides together with a zig-zag stitch. Then took the two ends and sewed as much as I could by machine, and then blind-stitched the rest of the hole closed by hand. Twist once in the middle and then place over my head. Even Rob was impressed!
I wonder how many more of these I'll make in the next couple of weeks. Hopefully enough to wear one every day!!!
Tuesday, January 24, 2012
Reverse applique...
"I challenge you to be dreamers; I challenge you to be doers and let us make the greatest place in the world even better."
-Brian Schweitzer
When I first dreamed of this project, I imagined the starburst peeking through a hole in a solid color fabric. I had to do a little online research to discover the "reverse applique" method. Thankfully I was able to adapt this tutorial from Sweet Verbena (super cute t-shirt, by the way!!) for my project.
Here's how I achieved the look for myself:
- Cut a rectangle out of khaki fabric. I wanted mine to ultimately fit in a 8x10" frame, so I cut my rectangle just larger... 9.5" by 11.5".
- Cut out a pattern shape from a cardstock. I free-handed a house shape, but then folded it in half to make it as symmetrical as possible.
- Trace around the pattern with a fabric marking pen.
- Cut out a rectangle of fusible interfacing just smaller than your khaki fabric. Mine was probably 8" by 10".
- Iron the fusible interfacing onto the back of your patterned fabric (or in this case, my starburst patchwork), as directed by the interfacing. Usually this requires steam and a damp pressing cloth.
- Trim around the patterned fabric, no need to deal with all of that extra fabric.
- Pin the patterned fabric to the back of the khaki fabric. Make sure that the tracing lines and the pattern are facing the same way and that your pins don't cross the tracing lines.
- Use a small and tight zigzag stitch to sew around the tracing lines to attach the patterned fabric to the khaki fabric.
- Trim the patterned fabric, leaving about 1/4" from the seam.
- Pinch up the top layer of khaki fabric (making sure not to grab the bottom layer!!) and cut an "x" to allow your scissors better access.
- Carefully use microtip scissors to trim close to the inside edge of the seam. In this project, I trimmed as close as possible. With knits or other fabrics, I might leave a bigger margin.
- Use water to remove the ink from the fabric marking pen.
- Voila! All you have to do now is find a frame and a place on the wall to hang! Although it would make an adorable pillow front or totebag as well!
Monday, January 23, 2012
Starburst patchwork...
"Oh what a tangled web we weave when first we practice to weave."
-Mignon McLaughlin
Can't promise this is the best/most efficient/most effective way to create a starburst patchwork! For this project, I didn't care much about fitting an exact size, so I didn't measure too closely (who am I kidding... that's not unique to this project, it's my normal method for crafting). And, yes, my result is a little wonky in places... the starburst didn't exactly close just how I wanted it to. But, I'm okay with that.
Next time, and yes, there will be a next time, I'll try to follow this tutorial from Film in the Fridge a little bit closer. In fact, maybe that quilt will be the next starburst project... or maybe just a couple of blocks to make an awesome pillow.
But, if you want to make your own starburst, here's my way...
- Cut strips of two different fabric patterns (preferably one solid and one pattern). Mine were about 8" long and between 3-4" wide. In the end, I needed 11 strips of each color, but I wasn't quite sure how many I would need until I was done.
- Pin strips of contrasting fabrics together at an angle. You want to match up one long edge of the solid strip with the diagonal of the patterned strip.
- Sew along this diagonal line. Repeat with 10 other pairs of strips.
- Press the seam open, and trim the pattern strip on the side where the seam allowance is.
- Pin together two pairs at an angle. Match up the side of a patterned piece with the diagonal of the solid strip. Sew, press, and trim.
- Continue matching up pairs until you create a full circle.
Sunday, January 22, 2012
Home Sweet Home applique...
"Everyone who's ever taken a shower has an idea. It's the person who gets out of the shower, dries off, and does something about it who makes a difference."
-Nolan Bushnell
Last night while lying in bed, I had a wonderful vision of a sewing project that could be framed and hung on the wall, next to this letterpress print that my mom gave us for Christmas. Going through my fabric stash today, I realized I already had most of the supplies I needed. A quick trip to Joann's for fusible interfacing and some microtip scissors, and I was back to the apartment, ready for an afternoon of crafting.
I've been inspired lately by the thought of home (we've been househunting lately, and might be close to putting down an offer!) and starbursts (as you can see from the first page of my SMASH book).
1. Rainbow art, 2. Paper starburst, 3. Pinwheel painting, 4. Starburst quilt
I find it so invigorating to take an idea full circle from a nugget of an idea to the finished product in one day. Now, all I need to do is find a frame, and then of course, have a wall to hang it on.
Be on the lookout for tutorials in the next couple of days! And, hopefully in a month or so, you'll see it displayed in our new house!
EDITED TO ADD: Starburst patchwork tutorial & Reverse applique tutorial
Subscribe to:
Posts (Atom)